|
1 - About darkroom practices and raw converters
In today’s digital darkroom, Raw Converters have come to play a very important role. First, they are to the digital darkroom what film processing was to the chemical darkroom. Without the proper chemicals and processing there is no transparency or negative, only a latent image on film. Similarly, without a raw converter, there is no digital photograph, only numbers encoded in a raw file. In fact, and as if to prove this point, Raw Developer features a darkroom developing
Second, just like each developer produces a unique film development, each raw converter produces a unique digital photograph. In this sense, the choice of raw converter is not just made only out of necessity. It is also made for aesthetic reasons. And since aesthetics are personal in nature, it is up to each of us to find the best raw converter for our taste.
I have done my share of searching in this regard, having tested all the leading raw converters on the market today, except for Apple Aperture, which I will be trying out soon. In this essay I report my findings testing Raw Developer. In the next essay I will report my findings testing DXO 3.5. These two raw converters are very different. However, they are both worthy of your attention.
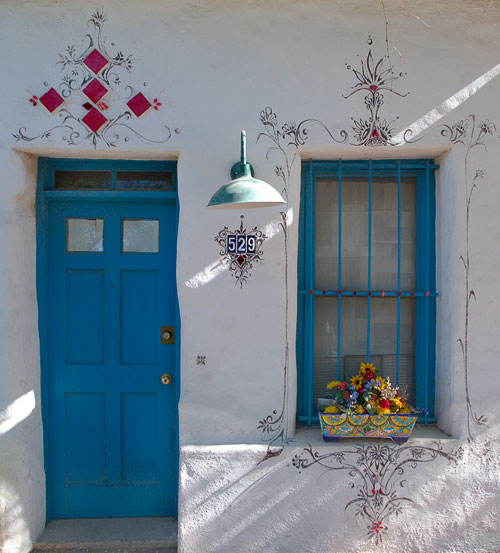
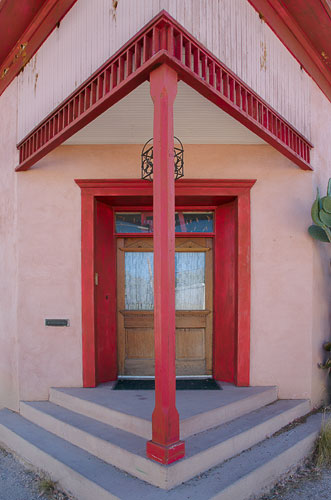
Blue Door & Window frame, Barrio Historico
2 - Raw Developer
Raw Developer is a Macintosh-only program offered by Iridient Digital. This is uncommon, since most of the time, when software is aimed at only one platform, it is available only for Windows. I personally use both a Macintosh and a PC, because I have found that the best software isn’t always written for both platforms.
What I like about Raw Developer is its price/quality ratio. At only $99.95, Raw Developer is one of the most affordable raw converters available. At that price one could expect lower quality conversions than can be had with other raw converters. However, the quality of the raw conversions made by Raw Developer is just as good, if not better, than those of more expensive raw converters.
3 - Interface
Raw Developer features floating palettes, similar to the approach used by Photoshop. The advantage of having floating palettes is that they can be hidden from view on demand, as opposed to palettes attached to the preview window which stay visible no matter what. This approach is different from the approach used for most raw converters in which the palettes are attached to the preview window.
In Raw Developer it is possible to show or hide each palette individually via a menu or keyboard command. However, I wish there was a “Hide all Palettes” command, the way there is in Photoshop, accessible by pressing a single keyboard keystroke. This would be a nice option to have when you magnify the image full screen and do not want to see the palettes.
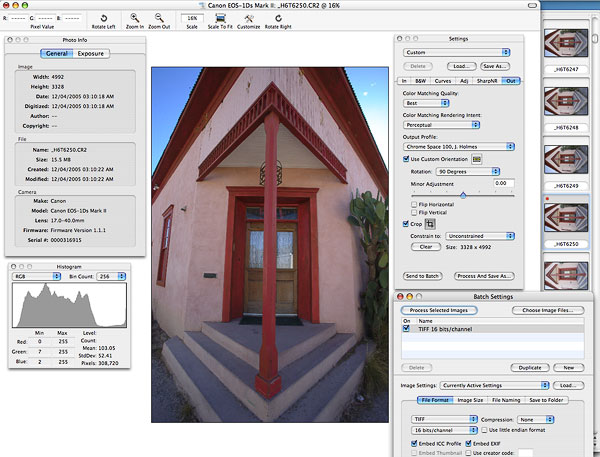
The Raw Developer work area.
The photograph I am working on in this illustration is the same as the photograph
at the end of this essay. Compare the two to see this image before & after.
The controls offered by Raw Developer are very complete. Besides the usual commands that one expects to find in a raw converter, Raw Developer features a very complete curves menu that allows you to adjust curves both in RGB and in LAB. This feature alone makes Raw Developer unique. Curve adjustments are not available in every raw converter. RGB plus LAB curve adjustment is only available in Raw Developer to my knowledge and as of December 2005.
What is interesting about this feature is not only that you can adjust curves in both color spaces, but that you can also do what I would call a double curve adjustment. For example, you can do a color correction curve in RGB and a contrast enhancement curve in the LAB Luminosity channel. Or, you can increase contrast in RGB and open the shadows in Luminosity. Or again, you can correct a strong color cast in LAB and add a contrast curve in RGB. The possibilities are numerous, and what would normally be achieved with two separate curve layers in Photoshop can be achieved with in a single curve operation in Raw Developer.
4 - Convert to black and white
Raw Developer also features a very complete convert to black and white function . This function allows you to convert color photographs to black and white using 4 different presets: CIE Lab, Luma, Desaturate and Intensity. It also lets you tone your image through Hue and Chroma sliders, and even convert with a complete Channel Mixer option. The channel mixer is normally found only in Photoshop and in 3rd party plug ins, making Raw Developer an attractive converter if you do a lot of black and white conversions.
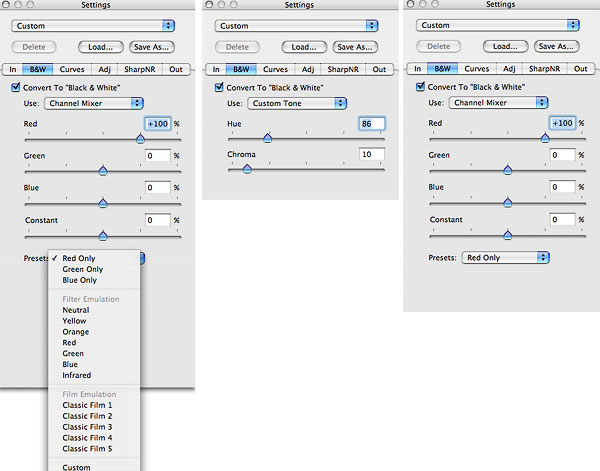
The Convert to Black and White option
5 - Custom Default Settings
I always need to set custom default settings in my raw converter. For example, I use a custom color space, I prefer not to do any sharpening, I like to convert to a 16bit tiff file, among other personal preferences.
The way one sets a custom setting in Raw Converter is a little different from most of the raw converters I have previously used. In Raw Converter custom settings are set for a specific camera. If you convert raw files created with several different cameras, you will need to create a custom setting for each camera.
Furthermore, if you open a raw file in Raw Converter, and later create a new Custom Default Setting, you will need to delete the settings file for that image otherwise it will continue to open with the default settings that were in effect when you first opened this image. Since I found out about this approach only after working on a folder of images, I had to delete all the setting files in that folder so that my new Default Settings would show up.
Once your custom default settings are set for a particular camera, Raw Converter automatically finds which camera was used for each image, and your custom settings are automatically applied to each new image.
To create a custom default setting start by selecting the settings you want in the “Out” area of the Settings palette. Then, choose "Make Settings Camera Default" from the File menu and all future images opened from that particular camera model will use the new default. If you have multiple camera models you will have to do this for each camera.
Red Entrance, Barrio Historico
6 - Clipping warnings
Raw Developer gives you the choice of 3 clipping warnings: the usual highlight and shadow warnings plus a saturation warning. You turn these on and off via a menu control of via keyboard commands. The saturation warning is very useful. I do withs though that there all three clipping warnings could be turned on and off from the toolbar, the way image rotation, image size, etc. are controlled. I also wish there were four clipping buttons in the toolbar: a single button to turn all 3 warnings on and off at once, and 3 separate buttons to turn each warning on or off individually. I find it easier to turn warnings on and off in the toolbar. Also, a quick look at the toolbar tells me if the clipping warnings are on or off. This is very useful when I don’t see any warnings in an image and need to know if the clipping warnings are on or off.
7 - Thumbnails
The thumbnails can be located to the right, left, top or bottom of the image. This is very practical. However, the thumbnails do not rotate when an image is rotated nor do they show other changes made to the raw files. I personally like to rotate each of my photographs to see them in the proper direction. Unfortunately, without the thumnails showing rotation changes, I am forced to click on the image to see the rotated version.
8 – Preview size and Scrolling
Raw Developer shows the full image in real size directly in the main image window. You can enlarge the image to 100% and beyond, and doing so is virtually instantaneous on my Macintosh G5 double processor. This is different from many raw converters which let you enlarge only a small area of the photograph, and in a special preview window instead of in the main window. In this respect Raw Developer shows the image very much like Photoshop does, and this makes working on the image a lot easier as you can zoom in and out at will and quickly. A Hand Tool is available to move around the image or you can use the window sliders.
9- Adjustments
The Adjustments palette not only offers brightness, contrast and hue/saturation adjustments, as nearly all raw converters do. it also features separate brightness settings for highlights, midtones and shadows. A tint adjustment is available as well, with separate sliders for tinting highlights, midtones and shadows. I don’t remember seeing a tone adjustment in a raw converter before.
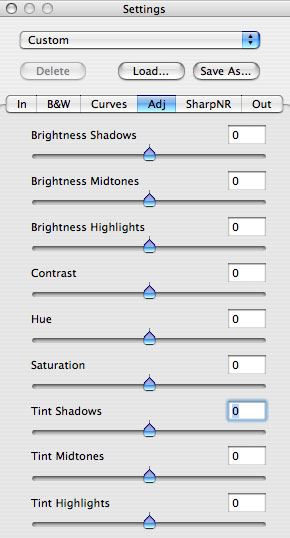
The adjustments palette
10 – Conclusion
Raw Developer is a Raw converter with several unique features not found in other raw converters, an affordable price point, and the ability to deliver high quality raw conversions. As I pointed out in the course of this review, some improvements can be made to make it more practical and easy to use, however it functions very well as it is offered at this time.
One of the things I like the most about Raw Converter is the quality of the color. Color in Raw conversion is somewhat elusive. Each converter has its own way of handling color and each converter delivers a slightly different color quality. In my estimate Raw Developer delivers very clean and pure color. Clearly these are subjective rather than objective remarks. But, after all, what makes me prefer a conversion better than another is not always objective. In the end, the aesthetic aspect takes over. At least it does for me.
Raw Developer is available from Iridient Digital at http://www.iridientdigital.com
Alain
All the photographs in this review were converted with Raw Developer.
Final image adjustments were done in Photoshop CS2
Essay and photographs Copyright © Alain Briot 2006
All rights reserved worldwide
.
|
 |
|
|
|
|